How to set up eero beacon mesh ?
Setting up your Wi-Fi shouldn’t feel like decoding hieroglyphics. With the Eero Beacon Setup, it’s all about seamless connectivity in a few easy steps. Let’s dive into the nitty-gritty of setting up your network hub and ensuring flawless performance. What is eero Beacon? eero Beacon is a compact device designed to extend the range of your existing eero Wi-Fi network. Its sleek design disguises a powerful tool that eliminates dead spots, providing a seamless Wi-Fi experience throughout your home. Step 1: Unboxing and Placement of Eero Beacon The first impression counts! Unbox your Eero Beacon and strategically position it within your space. Optimal placement ensures maximum coverage and signal strength. Step 2: Powering On and Initial Connection Plug in your Eero Beacon and power it on. The LED light will guide you through the setup process. Connect your device to the Eero network using the default credentials provided in the setup guide. Eero Beacon Setup via Eero App The eero app is your gateway to effortless eero Beacon setup. Follow these steps: Visit your device’s app store, search for “eero,” and download the app. Once installed, open the app to begin the setup process. If you’re a first-time user, create a new eero account. For existing users, simply sign in to your account to proceed. Follow the on-screen instructions to add eero Beacon to your existing eero network. The app will guide you through optimal placement for enhanced coverage. Personalise your network by giving it a unique name and setting a secure password. These details ensure your network remains private and protected. Ensure your mobile device is connected to your existing eero network before initiating the setup process. Also Read: Eero Pro 6 AX4200 Wi-Fi Mesh Setup FAQs:
How do I Setup my Eero Again?
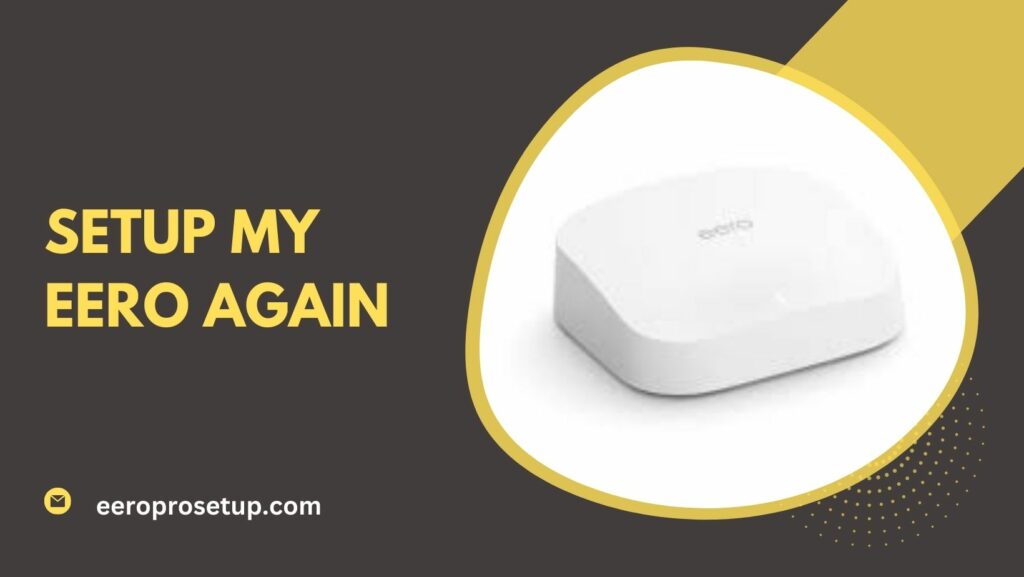
To setup your Eero again, start by connecting the primary Eero device to your modem using an Ethernet cable. Power it up, and when the light turns blue, open the Eero app on your smartphone. Follow the simple on-screen instructions to add your Eero network. Place additional Eero devices in different areas of your home for optimal coverage, connecting them as prompted. Once you link all devices, your Eero network is ready to deliver seamless Wi-Fi connectivity throughout your space. Understanding the Basics Setup my Eero Again Before delving into the setup process, let’s briefly explore the fundamentals of Eero and understand why you might need to set up your Eero again. Eero is a robust home Wi-Fi system designed for optimal internet coverage. If you’ve encountered issues or are upgrading your network, the re-setup process becomes essential. Why Might You Need to Setup Eero Again? Understanding the reasons behind resetting your Eero is crucial. Whether it’s troubleshooting connectivity issues, adding new devices, or simply optimising performance, a fresh setup can work wonders. Step 1: Unboxing Your Eero Unpack your Eero devices carefully. Take note of the primary unit, usually labelled as such. This is the cornerstone of your network, so place it strategically for optimal coverage. Step 2: Powering Up Connect your primary Eero to a power source using the provided cable. Wait for the LED indicator to show a solid light, indicating it’s ready for setup. Step 3: Eero App Setup Now, it’s time to dive into the Eero app. If you don’t have it installed, head to your app store, download, and launch it. Troubleshooting Tip for Setup my Eero Again ALSO READ- Eero 6 AX1800 Dual Band Mesh System eero flashing white light Eero Internet Backup Resetting Your Eero WiFi Network In Conclusion: Congratulations! You’ve successfully navigated the intricate terrain of setting up your Eero router. Remember, the Eero app is your ally in this tech endeavour, and with a dash of patience, you’ll be basking in a high-speed, reliable network. FAQs:
Enhancing Your Home Network: A Comprehensive Guide to Setup eero in Bridge Mode
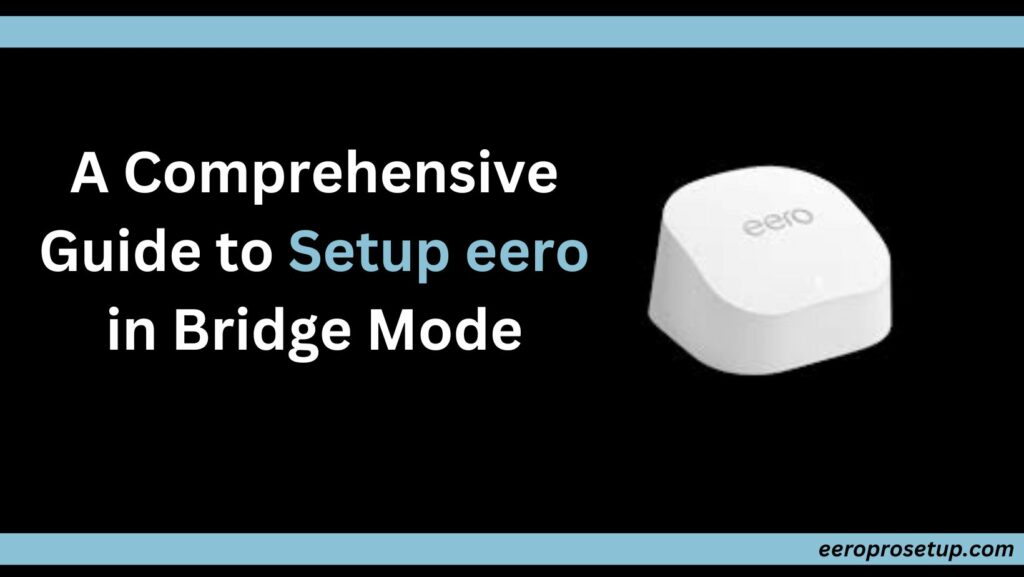
eero is a leading brand in the mesh Wi-Fi system market, known for its reliable and high-performance devices. One advanced feature offered by eero is the ability to configure its routers in bridge mode, which is useful for users who want to integrate eero seamlessly into an existing network. In this guide, we will walk you through the process setup eero in bridge mode to enhance your network’s performance and coverage. What is Bridge Mode? Bridge mode transforms your eero device into a dedicated Wi-Fi access point, allowing it to work harmoniously with your existing router without creating a separate network. This is particularly beneficial for users who wish to maintain the advanced features of their primary router while leveraging eero for its exceptional wireless capabilities. How to manually setup eero in bridge mode ? Step 1: Basic Connections Power Up eero: Connect to Modem: Step 2: Initial eero Setup Download eero App: Create eero Network: Step 3: Enable Bridge Mode Access eero Settings: Toggle Bridge Mode: Step 4: Physical Connection Connect to Router: Step 5: DHCP Configuration Disable DHCP on eero: Step 6: Wireless Configuration Match Wireless Settings: Step 7: Verify Connectivity Check Connected Devices: Step 8: Optional Advanced Settings Explore Advanced Settings: Also Read: Eero with an Existing Router Eero 6 AX1800 Dual Band Mesh System Step 9: Regular Monitoring Monitor Network Performance: Troubleshooting Tips for setup eero in bridge mode Even the most advanced technology can experience glitches. Don’t worry; we’ve got you covered with these troubleshooting tips in setup eero in bridge mode. Restart Devices: Check LED Indicators: Verify Bridge Mode Status: Contact eero Support: Conclusion Setup eero in bridge mode is a user-friendly process that enhances your network’s capabilities seamlessly. By following these steps, you can integrate eero into your existing network, extending coverage and performance effortlessly. Whether you’re a tech enthusiast or a casual user, the flexibility provided by eero in bridge mode ensures a smooth and efficient networking experience.
How To Fix Eero Blinking White Light? Find Reasons & Fixes!
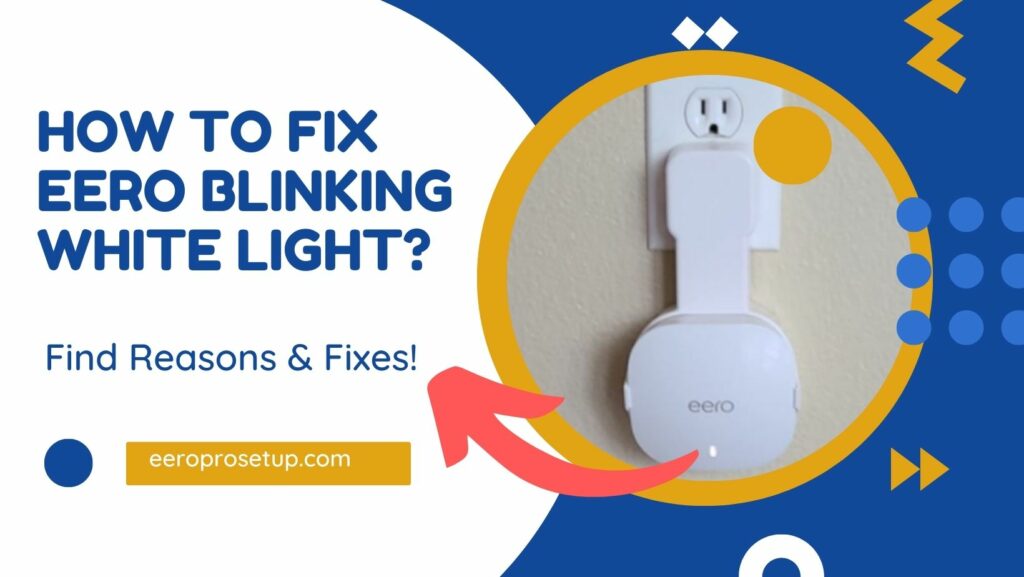
Eero, a renowned mesh Wi-Fi system, is celebrated for its flawless connectivity. Yet, users sometimes encounter the vexing Eero Blinking White Light dilemma. In this comprehensive guide, we delve into the intricacies of the eero flashing white light phenomenon and present effective solutions to ensure your Eero system functions seamlessly. Unraveling the Mystery: Why Does Eero Blinking White Light? 1. Initial Setup: A blinking white light on Eero may signal its initiation in the initial setup mode, awaiting configuration. 2. Firmware Updates: Eero devices often exhibit white blinking during firmware updates. Ensure an ample duration for the update process to complete. 3. Internet Connection Hurdles: A blinking white light may indicate issues with the internet connection. Conduct a thorough check of your router and modem. 4. Factory Reset: Eero may blink white during a factory reset. Confirm if a reset was indeed initiated. 5. Mesh Network Synchronization: Setting up a mesh network may prompt blinking white lights, signifying synchronization between Eero devices. 6. Offline Status: A device displaying a white light may be momentarily offline. Verify its connection and power source. 7. Software Glitch: Occasional software glitches may trigger the white light. Restart the device and assess for any enhancements. 8. Network Interference: Signal interference from nearby devices can lead to connectivity issues, resulting in a blinking white light. 9.Hardware Malfunction: In rare cases, a hardware malfunction might be the culprit. Contact Eero support for expert assistance. 10. Pending Configuration Changes: Recent changes to network settings may prolong the white light. Ensure pending configurations are completed. Troubleshooting Guide for Eero Blinking White Light: Power Cycle: Check Internet Connection: Eero Placement: Update Firmware: ISP Issues: Eero LED Patterns: Factory Reset (if necessary): Device Interference: Contact Eero Support: Check for Outages: Remember to follow these steps systematically. If the issue persists, seeking assistance from Eero support is recommended. FAQs: Conclusion: In conclusion, conquering the Eero Blinking White Light is attainable with the right knowledge and steps. Recap the troubleshooting measures, stay informed with regular updates, and embrace the support available from Eero. Your seamless connectivity experience awaits!
How to turn off WiFi on my existing router?
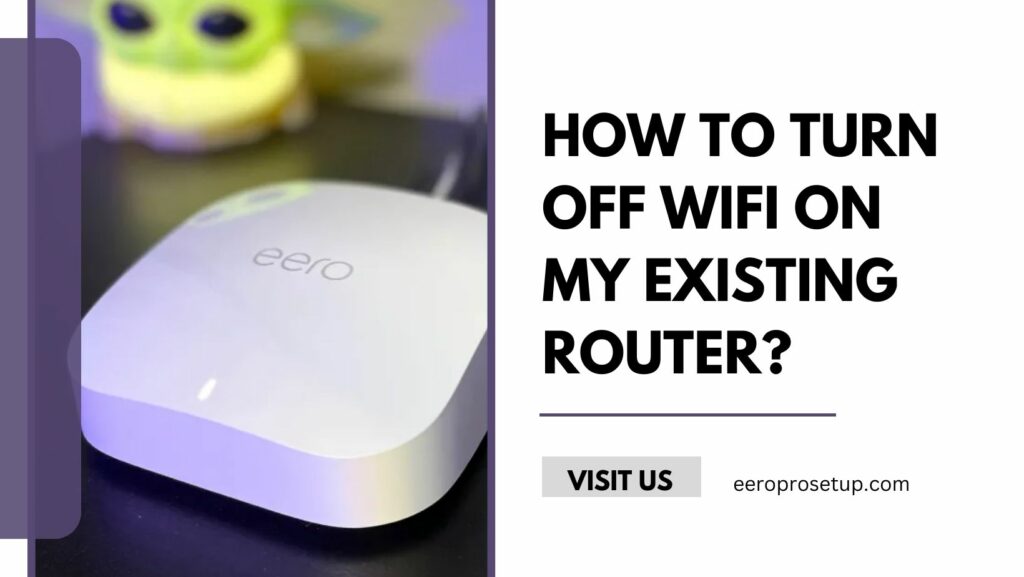
For many users, eero becomes the primary router at home, serving as the sole provider of WiFi signals. However, for numerous others, eero collaborates with an existing ISP router, typically in the form of a modem-router combo or an “all-in-one” device. If your home falls into this category, this article is tailored for you! Here you can know about how to turn off WiFi in easy. Why should I turn off WiFi on my ISP equipment? To clarify, connecting your eero to an ISP modem-router is perfectly acceptable and won’t lead to any performance or functionality issues. Nevertheless, maintaining a second Wi-Fi network in your home can give rise to various WiFi-related complications. To avert these issues, it is highly advisable to turn off Wi-Fi your non-eero router. What issues might arise? Among the potential challenges stemming from multiple networks in the same home, these are the most prevalent: How to turn off WiFi? As the existing WiFi broadcast in your home emanates from your ISP equipment, you won’t be able to directly edit or adjust it using the eero app. In most cases, this setting requires modification by connecting a device, such as a laptop or PC, directly to the modem-router. Alternatively, you may be able to edit these settings through an online portal provided by your ISP. If you’re uncertain about which method applies to your router, reaching out to your service provider is always the best way to seek assistance with this change. Manual Adjustment Method: When manually disabling Wi-Fi on your modem-router, follow these general steps. 1. Access the Admin Panel: Open a web browser and enter the router’s IP address (commonly 192.168.1.1 or 192.168.0.1) to access the router’s admin panel. 2. Login Credentials: Enter the username and password to log in. Default credentials are often found on the router or in the user manual. Change them for security. 3. Locate Wireless Settings: Navigate to the wireless settings section within the admin panel. This may be under a tab like “Wireless” or “Network Settings.” 4. Find WiFi On/Off Option: Look for an option to turn off or on Wi-Fi. It might be labeled as “Enable Wireless,” “Wireless On/Off,” or similar. 5. Click Disable/Off: Once located, click the disable or off option to turn off the WiFi functionality. 6. Save Changes: After disabling Wi-Fi, find a “Save” or “Apply” button. Click it to save the changes you made. 7. Wait for Confirmation: Give the router a moment to apply the changes. You might see a confirmation message or a loading indicator. 8. Restart the Router: Some routers may require a restart for changes to take effect. You can find a restart option in the admin panel. 9. Check WiFi Status: Confirm that the Wi-Fi is indeed turned off by checking the indicator lights on the router or attempting to connect a device wirelessly. 10. Re-enable WiFi (if needed): If you ever want to re-enable Wi-Fi, follow the same steps but choose the option to enable or turn on the Wi-Fi functionality. Web Portal Method: If your ISP provides a web portal for adjusting router settings, follow the same steps as above, with one key difference. Instead of connecting a device directly to the router, navigate to your ISP’s web page, log in using your subscriber account information, and access the router settings page. Once there, follow the same steps and tips mentioned earlier to locate and disable the WiFi broadcast of your modem-router. FAQs Conclusion: If you’ve successfully disabled your modem-router’s WiFi, the only personal WiFi name you should see is the eero WiFi name. Ensure all your devices are connected to the eero’s WiFi for the best speed, coverage, and stability in your home. Enjoy the seamless connectivity!
Troubleshooting your eero or modem connection
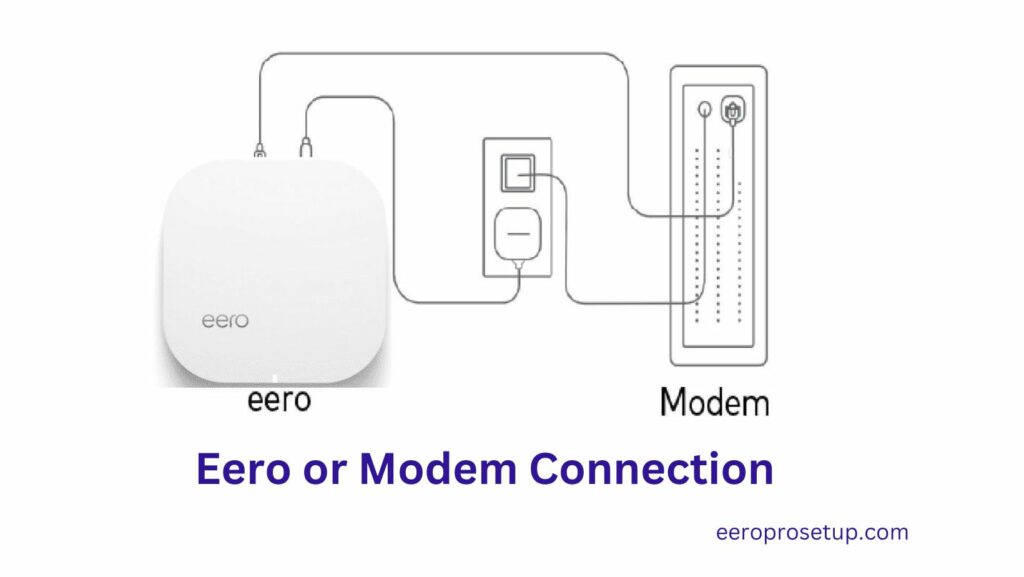
In the digital age, a smooth internet connection is the lifeline of our daily lives. However, there are moments when the virtual highway encounters a roadblock, leaving us stranded in the online abyss. Fear not, for this guide is your trusty map to navigate the twists and turns of troubleshooting your eero or modem connection. Understanding the Basics troubleshooting your eero or modem connection Before we dive into the nitty-gritty, let’s make sure we’re on the same page. Troubleshooting your eero or modem connection is essentially about finding and fixing issues that disrupt your internet experience. It’s like being your own IT superhero, cape optional. Charting a Course: Basic Troubleshooting Techniques Now that we know our foe, let’s arm ourselves with some basic weapons: 1. The Power Cycle: This internet-troubleshooting classic is often overlooked, but it can work wonders. Simply power cycle your eero and modem by unplugging them for a minute, then plugging them back in. This can reboot stuck processes and clear temporary glitches. 2. Check the Cables: Loose or damaged cables are like barnacles on your internet ship, slowing you down. Inspect all the cables connecting your eero, modem, and any other devices, ensuring they’re snug and undamaged. 3. Restart the eero App: Sometimes, the app itself can get a bit groggy. Try closing and reopening the eero app or even restarting your phone or tablet. 4. Channel Surfing: If you’re using an older eero model, try changing the Wi-Fi channel. Interference from other networks can disrupt your signal. The eero app can recommend the optimal channel for your location. 5. Firmware Update: Outdated firmware can cause a host of issues. Check for and install any available firmware updates for your eero and modem. When the Going Gets Rough: Advanced Troubleshooting Tactics If the basic manoeuvres haven’t brought calm seas, fear not! We have more tricks up our sleeve: 1. eero Support: The eero support team is a friendly bunch of tech wizards. Don’t hesitate to reach out to them via chat or phone. They can help diagnose your problem and suggest further troubleshooting steps. 2. Modem Manufacturer Support: Similarly, your modem manufacturer’s support team can be a valuable resource. They have specific knowledge of their hardware and can guide you through troubleshooting specific to your modem model. 3. Factory Reset: This is the nuclear option, but sometimes it’s necessary. Resetting your eero and modem to factory settings will wipe out all custom configurations and return them to their original state. This can be helpful if you suspect a setting is causing the problem. 4. Hardware Check: If all else fails, it’s possible your eero or modem hardware is malfunctioning. Contact your ISP or eero for warranty replacement options. Remember: Before performing a factory reset, back up your eero network settings if possible. Battling the Storm: Common eero and Modem Issues Knowing your enemy’s tactics is half the battle. Here are some common eero and modem issues and their solutions: eero Issues: Modem Issues: ALSO READ- Eero Pro 6E AX5400 Tri-Band Mesh Wi-Fi Setup Eero Pro 6 AX4200 Wi-Fi 6 tri-band gigabit mesh Setup Eero 6+ AX3000 Wi-Fi Dual-Band Mesh setup LED light on my eero Conclusion: As we bid adieu to the troubleshooting odyssey, let’s embrace the challenges of the digital dance floor. With each step, we become the choreographers of our internet destiny. Troubleshooting your eero or modem connection is not just a task; it’s an art. May your signals be strong, your downloads swift, and your connection forever unwavering. Frequently Asked Questions (FAQs)
How do I configure port forwarding on my eero?
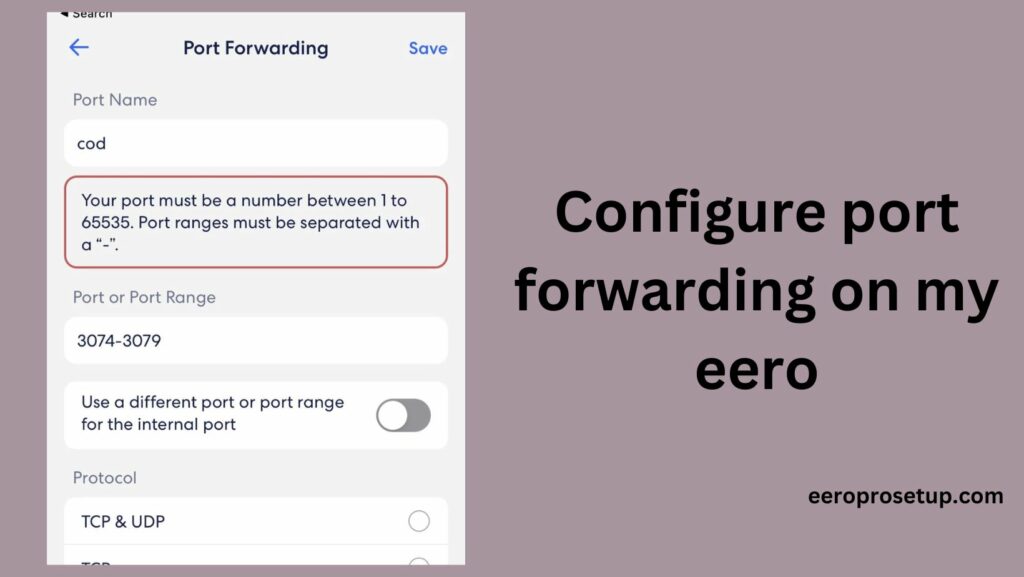
Ah, the glorious internet! A sprawling digital landscape where we game, stream, and connect with the world – all at the blink of a virtual eye. But what happens when certain apps or devices feel sluggish, stuck in the internet slow lane? Now, hold on! Don’t let the fancy term scare you away. configure port forwarding on my eero is like opening a special gate in your digital walls, letting specific traffic flow smoothly to the devices that need it most. Think of it as a VIP lane for your favorite online activities, ensuring they run like greased lightning. But before you grab your digital toolbox, let’s break down the basics: What is Port Forwarding Anyway? Imagine your home network as a castle, your devices as the residents, and the internet as the bustling marketplace outside. Ports are like specific gates in the castle walls, designated for different types of traffic. By configure port forwarding on my eero, you open one of these gates specifically for a particular device or application, ensuring it gets the smooth, uninterrupted internet flow it craves. When Do You Need to Open the Gates? Not every app or device needs a dedicated gate. But if you’re experiencing lag in online gaming, buffering during video calls, or sluggishness with apps like Plex or torrent clients, then configuring port forwarding on your eero might be the key to unlocking their full potential. Gathering Your Digital Supplies: Before we break down the how-to, make sure you have the tools at hand: Configure port forwarding on my eero Now, let’s embark on the configure port forwarding on my eero journey: Bonus Tips for configure port forwarding on my eero: Congratulations! You’ve configure port forwarding on my eero challenge and unlocked a world of smoother, faster internet experiences. Now go forth, brave adventurer, and enjoy the fruits of your digital labor! Read more: eero setup FAQs
Ultimate Guide: Setting Up Your Eero with an Existing Router
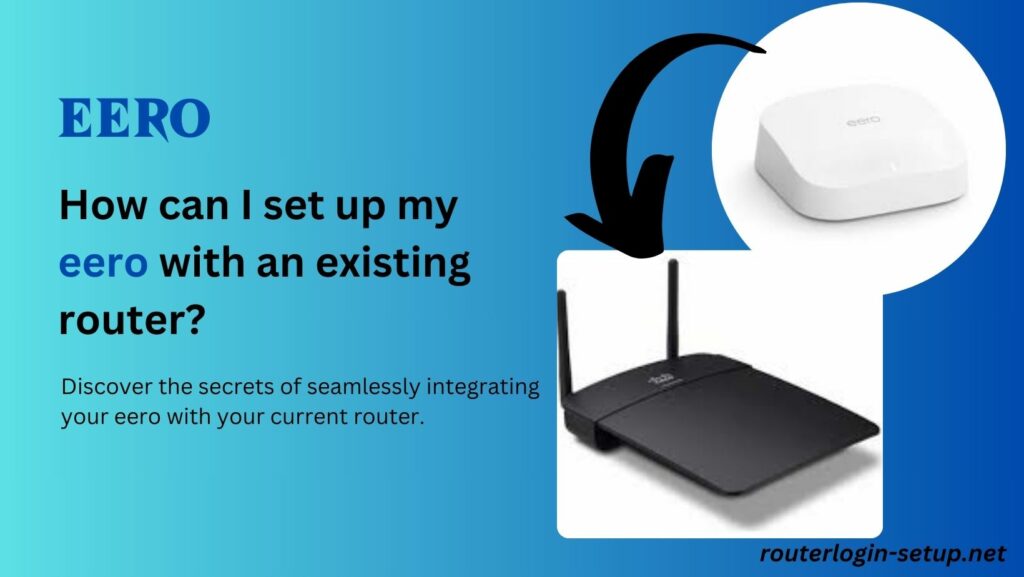
If you’ve ever pondered, “How can I set up my eero with an existing router?” you’re in the right place. Navigating the realm of mesh network installation may seem a bit challenging, but fear not—we’re here to guide you. In this comprehensive guide, we will delve into detailed, step-by-step instructions, offer valuable tips, and address frequently asked questions, ensuring a smooth integration of your eero with your current router. So, fasten your seatbelt, and let’s plunge into the fascinating world of mesh networking. Understanding the Basics Before we embark on this setup journey, let’s take a brief moment to understand the basics. The term “mesh network” might sound like something out of science fiction, but in reality, it’s all about establishing a sturdy and efficient Wi-Fi network by connecting multiple access points. In our scenario, we’re introducing the eero into the mix while keeping your existing router in the equation. What Makes Eero Special? The eero stands out from the crowd; it’s not your typical run-of-the-mill router. Crafted to provide swifter and more dependable internet coverage across your entire home, its mesh technology guarantees a robust Wi-Fi signal in every nook and cranny, eradicating those troublesome dead zones. Configuration of Eero with your existing router via WPS Method How can I set up my eero with an existing router? The WPS method is perfect for those seeking simplicity and speed. 1. Find the Right Spot Before anything else, determine the optimal placement for your eero device. Remember, location matters—a central spot ensures uniform coverage. 2. Power Up Plug in your eero device and power it up. Watch as it comes to life, ready to enhance your home network. 3. WPS: A Swift Connection If your existing router supports WPS (Wi-Fi Protected Setup), this method is a breeze. Simply press the WPS button on both your router and eero, and they’ll establish a secure connection automatically. 4. Wait for the Magic Give it a moment. The devices will sync up, and your eero will extend the Wi-Fi coverage seamlessly. 5. Confirm and Customise Once the connection is established, confirm the setup through your eero app. Here, you can customise settings to your liking. How to Set Up Eero with your existing router via Web-based Method ? For those who prefer a more hands-on approach, the web-based method offers greater control and customization. How can I set up my eero with an existing router? The WPS method is perfect for those seeking simplicity and speed. Troubleshooting Tips: Overcoming Common Challenges in Setting Up eero with Your Existing Router Setting up your eero alongside your existing router can be a breeze, but like any technological endeavour, you might encounter a hiccup or two along the way. Don’t fret—we’ve compiled a list of troubleshooting tips to help you navigate through potential challenges and ensure a smooth integration. Connectivity Issues: My eero Won’t Connect to the Existing Router Ensure that your existing router supports the same Wi-Fi standards as your eero. Inconsistencies in standards can cause issues with connectivity. Power down both your eero and existing router, wait a few minutes, and then power them back up. This simple step often resolves connectivity issues. If using the WPS method, confirm that your existing router supports WPS. If not, consider the web-based setup for a more universal approach. Encountering issues? A reset might be the solution. Use the reset button on your eero and follow the setup process once more. Keep your eero performing at its best by regularly checking for firmware updates. Visit the dashboard for hassle-free updates. Also Read: How do I connect my wireless printer to my eero? Frequently Asked Questions Conclusion In conclusion, setting up your eero while retaining your existing router is a straightforward process that offers a myriad of benefits. Whether you opt for the simplicity of WPS or the customization of the web-based method, your enhanced Wi-Fi experience is just a few steps away.
Say Goodbye to Disrupted Internet with Eero Internet Backup
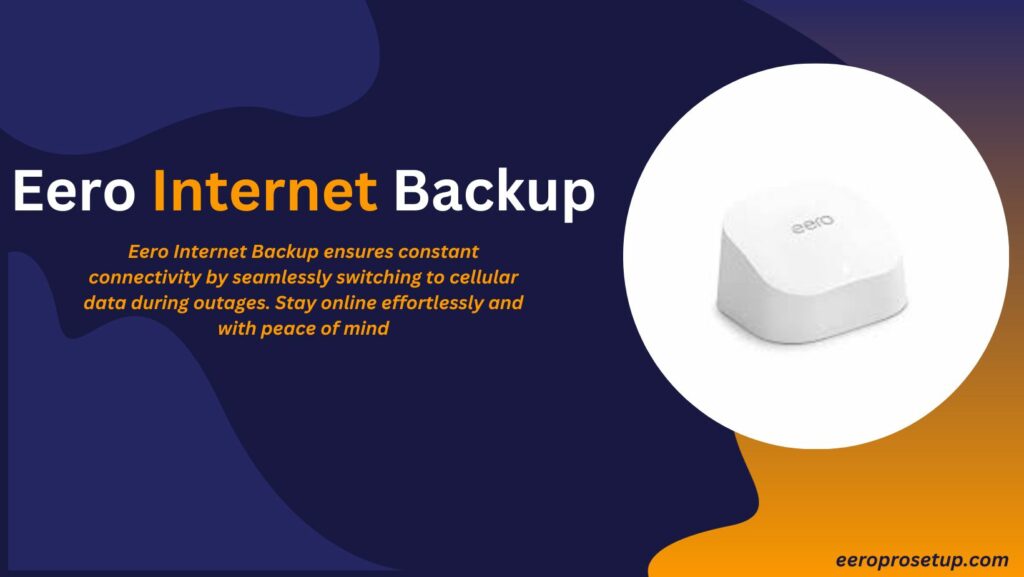
A dependable internet connection is essential in the digitally connected world of today. Eero, a leading name in home networking, understands the importance of seamless connectivity. The introduction of Eero Internet Backup is a game-changer, providing users with a robust solution to stay online, even in challenging situations. Understanding the basics 1. Uninterrupted Connectivity: Eero Internet Backup is designed to ensure uninterrupted connectivity, especially during critical moments when a stable internet connection is vital. 2. Cellular Failover Technology: This feature employs cellular failover technology, allowing Eero devices to seamlessly switch to a cellular data connection in the event of an internet service disruption. Setting Up Eero Internet Backup: Setting up Eero Backup is a straightforward process. To guarantee flawless connectivity, take the following actions: Also Read: Resetting Your Eero WiFi Network Eero 6 AX1800 Dual Band Mesh System Benefits Eero Backup ensures a seamless switch to a cellular data connection during internet disruptions, providing a reliable backup to keep you connected. For those with smart home devices, Backup ensures that connected systems, security devices, and other smart functionalities continue to operate without interruption. During emergencies or outages,this backup ensures that essential online functions, including communication and access to critical information, remain uninterrupted. Setting up this Backup is user-friendly through the Eero app, reflecting the brand’s commitment to providing technology that is easy to use and configure. Users appreciate the peace of mind that comes with knowing they can rely on Eero Internet Backup, especially in situations where a stable internet connection is paramount. The integration of Eero Backup with a compatible cellular plan is seamless, allowing users to effortlessly activate and utilise this valuable feature Conclusion: In conclusion, Eero Internet Backup is a groundbreaking feature that underlines Eero’s dedication to providing users with not just internet connectivity, but a reliable and resilient connection. Whether for work, communication, or maintaining a smart home ecosystem, Eero ensures that you stay connected when it matters most. Embrace the future of connectivity with Internet Backup.
Can I set my Eeros to use the 2.4 or 5 GHz frequency?
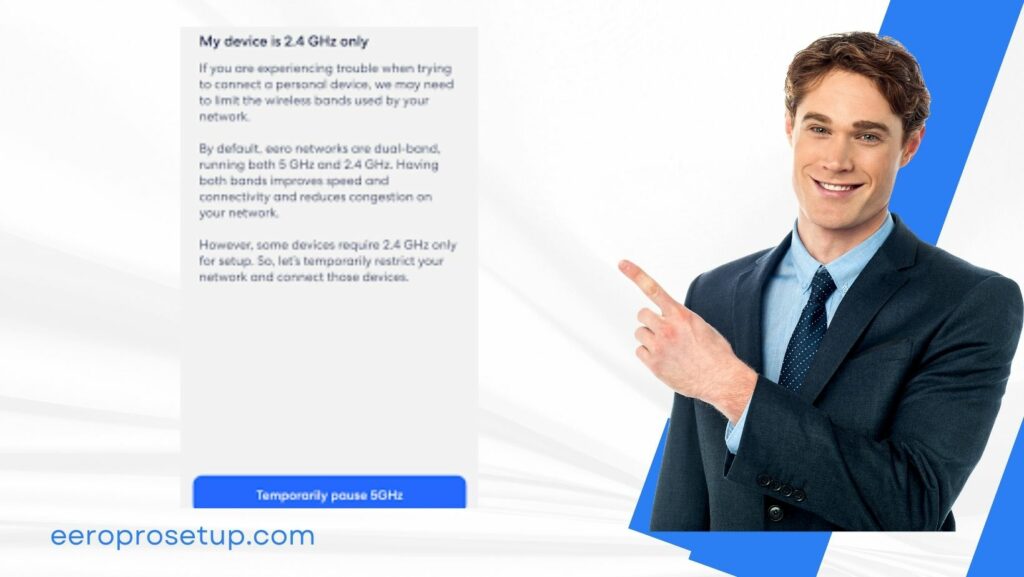
In the realm of Wi-Fi optimization, the ability to choose between the 2.4 and 5 GHz frequency bands is a crucial aspect. Can I set my Eeros to use the 2.4 or 5 GHz frequency. This question lingers in the minds of tech enthusiasts and casual users alike. Let’s embark on a journey to explore the depths of Eero’s capabilities and unveil the secrets behind frequency band selection. Understanding Eeros to use the 2.4 or 5 GHz frequency Wireless Wizardry Eero, a pioneer in the mesh Wi-Fi game, boasts a plethora of features aimed at delivering a seamless internet experience. One such feature is the flexibility to toggle between the 2.4 and 5 GHz frequencies, catering to diverse user needs. The 2.4 GHz Saga: Balancing Act Balancing Range and Speed The 2.4 GHz frequency provides a broader coverage range, making it ideal for larger spaces. However, the trade-off comes in the form of slightly reduced speed compared to its 5 GHz counterpart. Device Compatibility Dance Older devices often waltz better with the 2.4 GHz frequency. So, if you have legacy gadgets in your tech ensemble, this frequency becomes the stage for their performance. The 5 GHz Symphony: Need for Speed Unleashing the Need for Speed For tasks demanding high data transfer rates, the 5 GHz frequency takes the spotlight. Streaming 4K videos or engaging in lag-free online gaming becomes a breeze in this high-speed arena. Diving into Crowded Airwaves In densely populated areas, the 5 GHz frequency might face challenges due to interference. It’s a crowded airspace, and your Eero needs to navigate through it with finesse. Customising Your Eero’s Frequency Affiliation Now, let’s address the burning question: Can I set my Eeros to use the 2.4 or 5 GHz frequency. Absolutely! Eero empowers you with the autonomy to handpick the frequency that aligns with your specific requirements. Step-by-Step Frequency Fandango ALSO READ- Eero 6+ AX3000 Wi-Fi Dual-Band Mesh setup LED light on my eero In Conclusion: In the ever-expanding realm of wireless connectivity, the ability to customise your Eero frequencies adds a layer of personalization to your network. So, to answer the burning question, Can I set my Eeros to use the 2.4 or 5 GHz frequency?—the answer is a resounding yes! Take control of your network, embrace the possibilities, and enjoy a seamless online experience tailored to your preferences. FAQs: